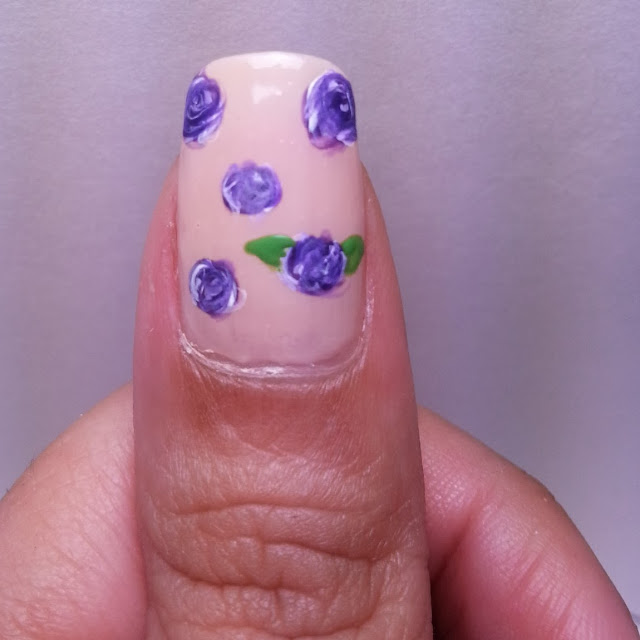
I really didn't want to have a whole week go by without any posts so I did a little simple design: roses.
How do you guys like them? I'm pretty satisfied with the end result. Though I'll admit, I wish I added a bit more light green to the leaves and a little less white. Regardless, I thought you guys might enjoy a step-by-step guide on how to accomplish this simple rose nail art design.
These are the tools I used to accomplish my look:
As you'll notice, I do use acrylic paint for my design as opposed to polish. It's a lot more comfortable for me to work this way but if you prefer polish you certainly may use that. Though I do encourage anyone who loves to do art on your nails to try acrylic paints sometime. The control you'll have is amazing. All my acrylic paints are purchased at Michael's, but you may also find some at Walmart, A.C. Moore, and wherever art supplies are sold.
I decided I would use a nude polish for the base to make the flowers really 'pop' so I used First Kiss by Orly. Remember to use a base coat first! After you let your polish dry, take your brush and using the acrylic paint create imperfect circles around your nail. I say imperfect because you don't actually want perfect round circles, they won't look much like roses if you do. Don't put them too close to each other, you want to leave room for the leafs at the end.
Now you're going to want a bit of white and the purple on your plate to touch and make a lighter shade of purple. With this lighter shade of purple go in and create small half circles within the rose. Now you'll want your brush to pick up the darker purple, a bit of the white, and a bit of the lighter purple all in the same stroke and do a whirl within the center of the rose. It's hard to explain in text but hopefully you can see the whirl effect in the photos. You can certainly go over it more than once until you get the desired effect.
Once you're satisfied with the whirls, it's time to add the leaves. Taking your green acrylic paint, you're going to do mini triangle-like shape on either side of your rose. Remember not to do them too large, you want them smaller than your actual rose.
Add your remaining leafs and remember not all roses have to have two leafs. After you've added all the leafs, you may want to mix the white and green for a lighter shade of green. This lighter shade of green can be used to add some dimension to your leafs.
After it's all dry, seal it off with a topcoat and that's it. It's a pretty basic straight forward design but still eye-catching. I hope you enjoyed this tutorial and if you have any questions please let me know down in the comments.


This is so cute! I love the color combo, and the tutorial is really helpful! I'm now following you from the bright side beauty hop :)
ReplyDeleteshadowlinergirl.blogspot.com
Great tutorial! The design is very pretty!
ReplyDeleteLinh @ blushology.net
This is such a cute idea! I'll have to try it soon. It's perfect for spring, I found you through the Blog Hop and have now followed!
ReplyDeletehttp://adelicaterosiebeauty.blogspot.com/
Follow me back?