So much for me polishing left and right this week. I did close to nothing this week when it comes to nails. I don't know why. It was a tough week, a lot of catching up on things I've been neglecting. But I won't lie, I'm feeling disappointed I didn't do more nail related things. Hopefully I can make up for that during this next week or so.
Today I wanted to show you a quick tutorial for nail artists of any level, Popart nails. This trend began last summer and it's really a great look to recreate anytime. Again, bunch of videos and whatnot out there so not claiming to be original. Here'll you will find my way to create this super easy design.
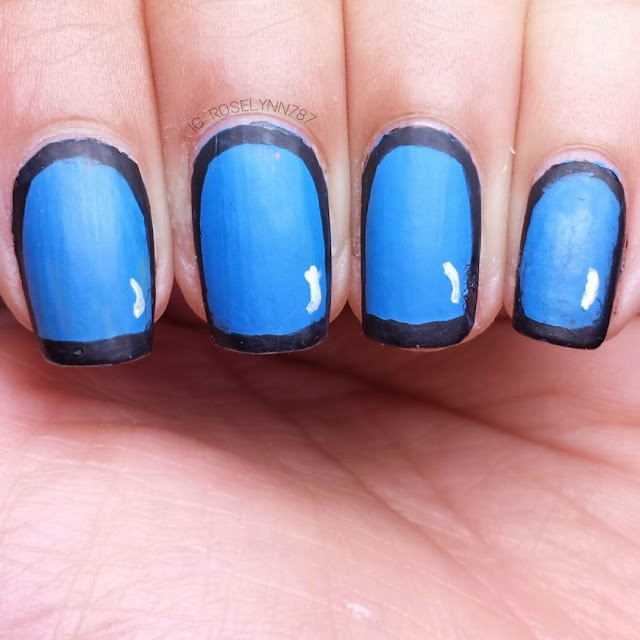
I'm really proud of myself for how these turned out. I don't think I have ever been able to complete this look so neatly before. I used to try this look with black polish for my outline but I discovered that using black acrylic paint helps so much more. Unless you have like a nail polish pen type of tool, I definitely suggest using acrylic.
Let me show you how to create this design!
Here's what you'll need to complete this design: 1 polish (preferably a neon or bright), white polish or acrylic paint, black acrylic paint or black nail polish, matte topcoat polish, and 1 thin-tipped art brush.
Start off by painting your nails using your choice base coat, then paint your nails the color of your choice. For this look I choose Avenue Maintain by Essie, absolutely love this color but you'll need two thin coats because it streaks a bit. Be sure that your nails are completely dry before continuing to the next step. You can always add a fast-drying topcoat to speed up the process.
Once your nails are dry, you are going to take your brush and starting outlining your nail. I got my brush from a local craft store but you can pick these up online as well. Most guides you find use polish instead of acrylic paint but I find having more room for error this way.
Since you'll be working with acrylic paint you can take your time going along the outline. You don't have to do the line in one stroke. You can slowly start drawing the lightly and then later go over it again. Make sure you stay as close as you can to the edge of your nail.
When you go to the bottom half, be careful not paint too close to your cuticle. You always want to make sure to this line and the line outlining the bottom of your nail are as straight as possible.
This last step is optional, though I think it adds a nice touch. You can use any tool such as a toothpick, art brush, etc to create a slightly curved line in the form of a half circle. You'll want to do this in either white paint or nail polish. Like I said, you can step this step but it adds more to the Pop Art feel of the design. After you're done, go over your nail with a matte topcoat and that's it.
I hope you guys have enjoyed this simple tutorial. Be sure to share your recreations with my on instagram or facebook!


I love how this turned out!
ReplyDeleteThis is very cool! Looks like it came right out of a comic book! Totally cute. Thanks for the tutorial
ReplyDelete