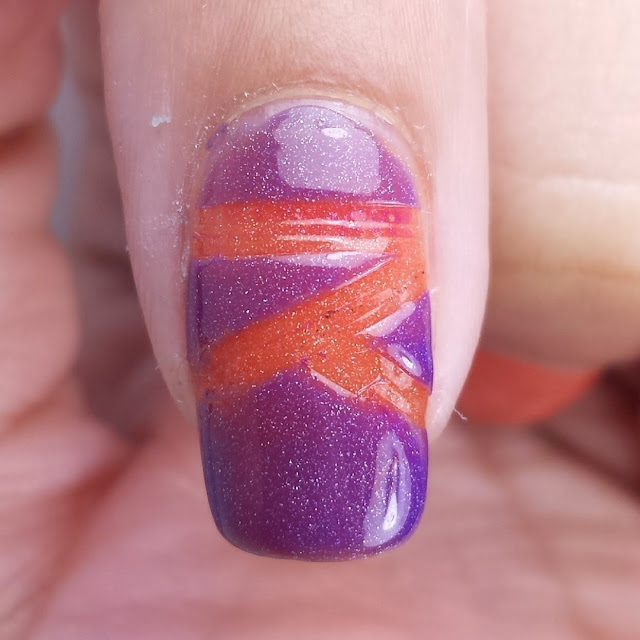
So what does water decals, thermal polishes, and striping tape end up being? Well take a look below at what I came up with.
Not bad, right? I wish it didn't have to much glare in this photo but there is another shot further down in the post. But first let's do a break down of how I accomplished this look.
The pictorial above shows you better much everything you need to know for how to get the awesome lines. But I'll go into a little further detail so you guys aren't left all confused.
 Your main tool here is striping tape which I know not everyone is a fan of sometimes. A little trick I picked up was putting your striping tape on an empty tape dispenser. It makes it a lot easier to handle and use. Before you start working on your actually mani, you will want to cut out a few pieces of tape and have them at your disposal. Cut about 9-12 pieces, make sure it's a good enough length to cover your nails width. You want to cut out that many because a singular piece is very thin. I layered three pieces together to create a thicker straight line.
Another important thing to note before you get started is to make sure your base coat of polish is completely dry. If it's not dry then the striping tape will lift it off when you remove it. Give your mani ten minutes to fully dry before you begin. For this mani, I'm using a thermal polish named Leo from the just released collection from Jior Couture.
 You want to start by laying your first straight across your nail. Like I said before, since a singular piece is too thin I used an additional two side-by-side so my line straight across is thicker. I decided to kind of layer my lines in a zig-zag pattern. That is after the first three straight across, put down three going across to the left. Starting from those three, lay down another three across to the right.
The next step is to take your choice of polish and paint your nail over the striping tape. For this look I used Aquarius which is one of the other thermal polishes being released.
The steps you see above are really simple. After you paint your nail over the striping tape, give it maybe 10 ten seconds or so and start removing the tape. You'll want to do this while the polish is still wet so don't wait too long. And pretty much that is all there is to it. Cover your design with a topcoat to smooth out any imperfections. You can do the same pattern on your other nails or do what I did and create different patterns.
You guys can see in my design I did decide to do something different for my accent nail. Water decals! Along with the zodiac-inspired collection, Jior Couture is also releasing matching water decals that respect each astrological sign. I made another quick little pictorial so you can see how I cut them out and place them on my nail. After you cut it out, place it in warm water for about ten seconds. Then place the decal face down onto your nail and firmly glide the back piece off. It's important to seal in the decal with a topcoat after you place it. Like I said, water decals are very simple to use but they can make any dull mani come to life!
I hope you guys have enjoyed this new segment because I had a lot of fun creating this mani. Water decals are one of my newest obsessions so I absolutely loved these. You guys can see what I have to say about these polishes in my other post. Everything used in this tutorial can be purchased from Jior Couture (will update later with pricing). If you have any questions please let me know down in the comments.
Store Link: http://www.jiorcouture.com/
Instagram: http://instagram.com/jiorcouture#
Facebook: https://www.facebook.com/JiorCouture


No comments
Post a Comment