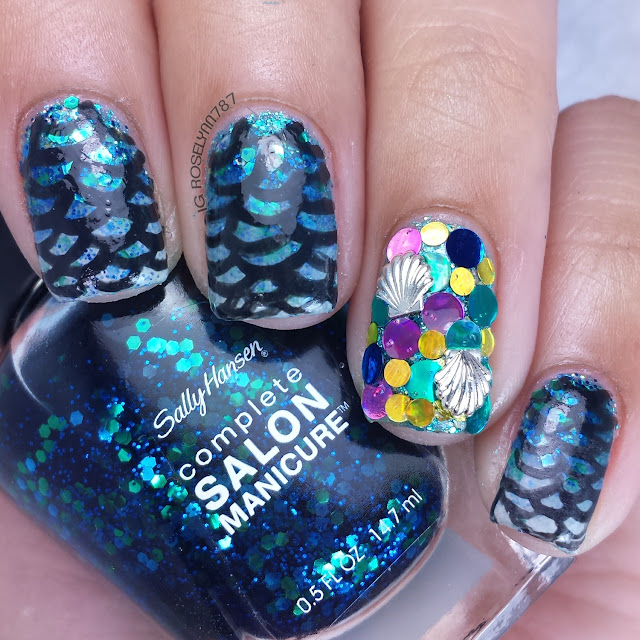
Mermaid nails have been something I have wanted to do for a long time, but could never really pull it off. I know what you're probably thinking... that accent nail am I right?! That was actually the first nail I did in this mani and the rest of the concept was built around it.
Here's a breakdown on the tools used to create this mermaid look.
- Polishes used: OPI My Vampire is Buff, Sincerely Polish Jasmine, and Sally Hansen: Mermaid Tears
- Makeup Sponge
- Small Detail Brush
- Black Acrylic Paint or Polish
- Seche Vite Topcoat
To start off paint your nails a teal glitter, I used a chunky glitter from Sincerely Polish called Jasmine. Now using a makeup sponge, dab on a heavier glitter (here I used Sally Hansen: Mermaid Tears). It's time to give the tips of your nails a sandy effect, which you can achieve by sponging OPI My Vampire is Buff.
For the next step, I prefer to use acrylic paint but black nail polish works just as well. Now taking your detail brush, use the black paint to start creating the mermaid scales from below your cuticles. The scales don't have to be perfectly matching, but should remain relatively thin and with a curved upward shape. Continue the pattern until the tip of your nail and once you're done give yourself enough time before applying topcoat.
And, of course, I can't skip out on sharing the macro of the accent nail. It's probably my favorite accent I have ever done in the last two years. If only glitter placement wasn't such a pain I would say I would do it more often, haha.


I love that accent nail!! This is awesome!
ReplyDeleteI love glitter placement manis so I say the more the merrier lol Super cute mermaid nails!
ReplyDeleteThat glitter placement! So GOOD!!!
ReplyDeleteLove that, you make it look so easy! So you do the same thing for the other hand, I don't think I could do anything that detailed with my left hand onto my right hand, hehe.
ReplyDeletelove love love it! especially the accent nail!!
ReplyDeleteWhat a great mani! I so hope u get the magazine spot bc this just looks amazing!!!!!!
ReplyDeleteWhat a great mani! I so hope u get the magazine spot bc this just looks amazing!!!!!!
ReplyDeletewoaaa that macro is crazy good!!
ReplyDeleteWow! More effort than I ever put in but I admire those that do :)
ReplyDeleteI still haven't tried mermaid nails. But your mani def makes me want
ReplyDeleteUmmm that accent nail is freaking killer!! haha! :D
ReplyDeleteI am in love with your accent nail! It's so sparkly and fun!!! Awesome job!!!
ReplyDeleteWow, these are beautiful! I love the accent nail!
ReplyDeleteOh my! I am crazy about that accent nail!!
ReplyDeleteI love the accent nail with the scales! So pretty!
ReplyDeleteSo pretty! That accent is TDF!
ReplyDeleteThat accent is BAD ASS. I love all of the glitters on top and how the base peeks through the glittered spaces. Great video tutorial too!!! The gradient is pretty enough on it's own as well!! I don't find this over the top at all!! Bring it on, the blingier the better!!!!
ReplyDeletePretty! I've just picked up some little shell studs so I'll have to give something like this a try soon! :)
ReplyDelete