
Hi guys! Do you like the new look? I have been dying to give the blog a new makeover and I'm really happy with how it turned out. But this new look is not the only thing I have to share with all of you. Actually I have a ton to share within the next few days, trying to pace myself, and I cannot wait. But for now my lips are sealed :3
For today's post I wanted to share the dotticure I created for the first challenge in the #nailartmar hash tag on instagram (credit to @californails who creates these challenges every month for everyone). This dotticure was actually one of the first nail art tutorials I ever watched and tried to replicate. I wish I still had a photo from a year ago so I could do a before and after type of thing. Then again... maybe I shouldn't wish that cause the 'before' was pretty embarrassingly bad. Anyway, I have improved since a year ago and thought it was a good time to recreate this popular design again.

This is a super simple design that anyone can do. I don't take credit for this design at all but I have come up with a pictorial for you guys in case you haven't seen how to do it. All you really need is a dotting tool and two different colored polishes.

I really like how it came out, though I wish my nails were longer. If you can't tell, I've had some really bad breaks this winter. But anyway, I'll take you on a detailed step-by-step guide on how to accomplish this look.
I've obviously skipped a few steps ahead in the pictorial, but I'll go over them with you here. After you've put on a base coat to protect your natural nails, paint your nails with the first color (I like choosing the lighter one of the two). After you've let it dry, I used straight nail vinyls to create a diagonal line. If you don't have vinyls, then you can use striping tape or even regular scotch tape. Paint the bottom portion of the diagonal line with your second polish of choice.
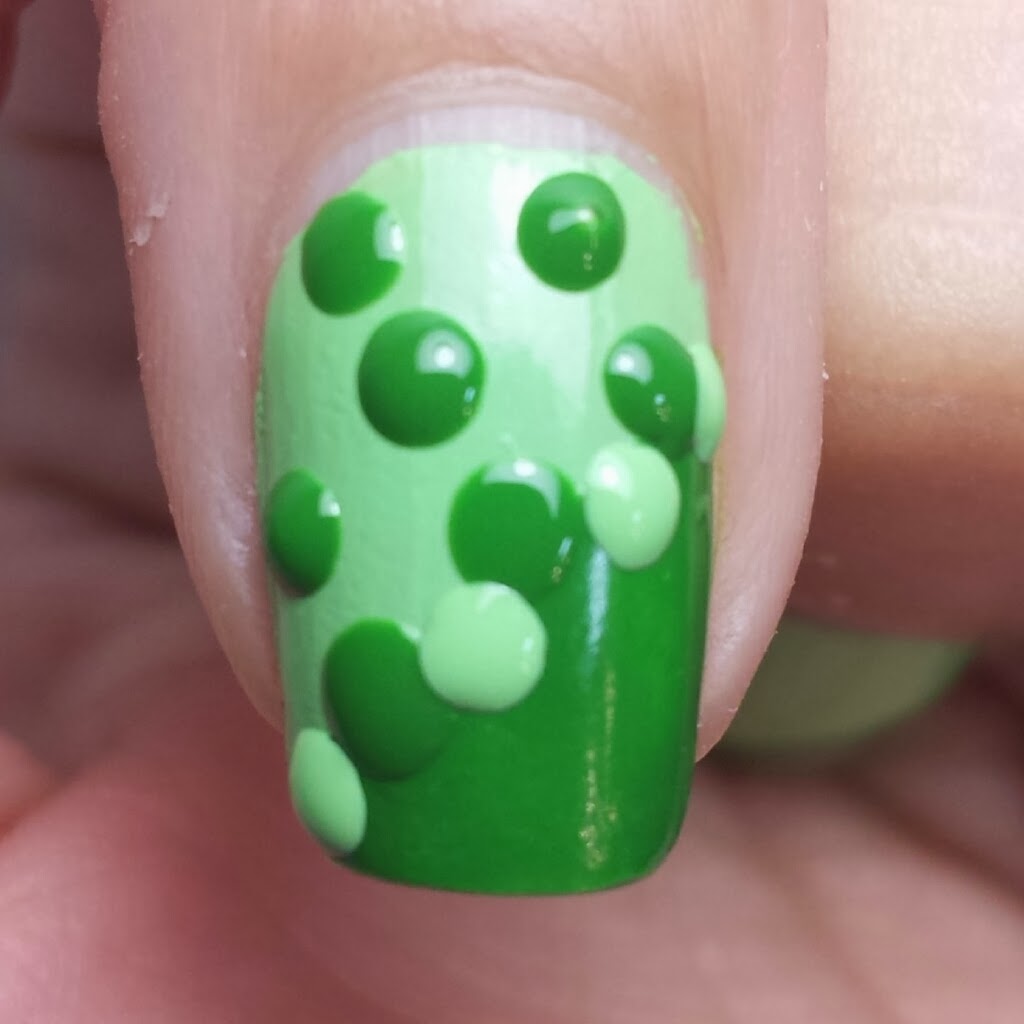
 This is where the pictorial picks up with first photo! As I mentioned before, the only tool you really need to create this design is a dotter. You can buy these on eBay, Amazon, or other stores like Born Pretty (link and discount code on the side bar). It's super cheap wherever you buy them so if you don't own some I definitely suggest picking yourself up a set. The photo to the left here is the size I'm using. You can use whichever size you like, but my only suggestion is not going much larger than this especially if you have smaller nails.
 Taking your dotting tool you will want to create your first dot using the second polish you choose in the middle of where the dividing line is. Leave some spacing (the spacing should ideally be enough to fit a dot without actually creating one) on either side of the dot and create more singular dots. I made three on each nail due to the small size of my nails but you can certainly create more if you have the room for it. You will then create more dots diagonally from the set you just made. Continue the pattern until there is no more room left. Don't worry about getting polish outside of your nail with the dotter, you can clean that up after you're all done.
After your nails have dried, make sure you add a topcoat as it will smooth out the dots and create a much neater look. However, you should make sure you have allowed enough drying time before you do this because you don't want to smear the polish.

I hope you guys have enjoyed this tutorial. If you decide to recreate this design be sure to let me know, I love looking at recreations.
i love this design!! Ill have to try it myself
ReplyDeleteWhen I'm stumped on a design I always find rescue in dots.... love this!!
ReplyDelete